I have begun the animation process. I have opted for a fairly unusual approach to it however, I am animating the camera around the scene before adding and animating the characters. Why? I hear you ask, well my scene is not completely devoid of characters, I have 4 in there at various points to allow me to position the camera at the correct height. The main motivation behind this decision was that I intend on having a very busy scene with lots of characters, as I already have the storyboard in my head I can animate the camera where I want, then I can see which characters need animated at which time, potentially saving me hours on animating people that are not even in shot.
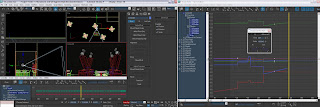
I have been working in dual screen with the curve editor permanently open on one screen, I can almost read it like a book now. Below is a screen dump of my extended workflow,
 The reason I need the curve editor so much because I am making my animation quite quick and all the keframes flow smoothly in to one another, as if the keyframe was not there. Max has a habbit of adding a slowing curve to the animation on either side of the keyframes. When I am animating around something I add the first and last keyframes then add the ones in the middle to curve the arc a bit, Max would then slow the animation down when coming in to the middle keyframe and speed up on exit, this makes for a very ‘stop start’ feel to the animation, not very smooth flowing.
Another problem that has arisen because of this is that, on the odd occasion, Max can not handle the curves without being told how to do it, what do I mean? In the picture below I was animating around the 2 characters whilst looking at their face, when adding additional keys to curve the motion Max added a massive Bezier curve causing the camera to look at the floor, by using the curve editor you can easily see where the problem lies and quickly correct it.
Here is how to achieve this.
- Draw your spline and adjust it in to the shape and position you want your animation to take.
- Select the camera (or any other object you want to follow the path), open the motion tab and select trajectories.
- Under sample range set the start time and end time and decide how many you want it to have. Samples means keyframes, if you select a start time of 0 and of 100 with end time 20 samples you will end up with 20 keyframes evenly spaced along your spline. Its important to realise here that of you do not have enough samples on a curve your animation will not be able to follow the path exactly, like below.
- Now turn on AutoKey and hit the convert from button and select the path, your camera is now constrained to the path but only for the time that you selected and is free to go anywhere else for the rest of the animation. Yo may find that if you can not get the rotation to match as you had wanted you will have to alter the rotation values yourself. With AutoKey still on go to the first keyframe and rotate the camera how you want, then do the same for the middle and last keyframe. Because the constraint did not set any rotation values for the rest of the keys you should find that thoose are the only keys you need to edit, the rest of the keys should inherit the correct values.


No comments:
Post a Comment